Showing posts with label Sewing. Show all posts

Wednesday, October 30, 2013

Shredder Girl, Episode 1

13 DAYS. 13 DAYS UNTIL I MOVE TO COLORADO. 13 DAYS TILL I LEAVEEEEEE!

I'm kind of in the freak-out stage right now. That point where it's starting to get close enough that it's real inside my head, so close that I can see the mountains and taste difference in the air...but also close enough that I realize that this move is going to be hard, and different, and it's something that I can't prepare for, even if I go to great lengths to ready myself for it.

That's scary.

I'm throwing myself off the proverbial cliff. Going to Colorado scares me. But the excitement for it is greater than any fear. And isn't that the whole point? How exciting would life be if there was no risk or pain or unknowns?

I remember when I rode my first roller coaster with one of my bestest friends, Lauren. We were so pumped to be riding something that big. We sat in the seats like nothing would hold us back. And then the coaster starting click          click                    clicking     up the first hill. As we got higher and higher and closer to the top, we were struck with absolute terror.

We started saying things like, "Why are we doing this?!" and "I don't ever want to do this again." We even accused each other of making the other one do it. Funny how fear turns us into the biggest blamers ever, eh?

But then suddenly we reached the peak of the coaster and we couldn't think of anything except that steep drop into nothingness. We screamed. And screamed. And kept screaming.

And somewhere along the way, during the loop-de-loops and the force-field spins and the crazy speed that made our eyelids peel back, we realized that we were having the most fun of our lives.

How does that even work? Does it honestly make sense to ride roller coasters and have that fear in your stomach, and yet enjoy it?

I don't really know. But I think that that's kind of how life is. And now Lauren and I are stepping onto another roller coaster together. We're going to live together (!!!) in Colorado while being snowboard instructors at a resort on a mountain. How cool is that?!

We're buckled into the seats (our plane tickets are bought, our stuff is being packed, we've set an end date for our Ohio jobs). Now we're clicking our way to the top of this coaster. And it's scary and beyond amazing. 

This chick, Lauren, that I'm going with...she's an amazing, gorgeous, Godly woman, and we have been friends for years. Since we were like 8 or something. We've been skiing and snowboarding together for ages, too. There was one season out at Snow Trails where we both had a red hoodie that we loved to wear on the slopes. I liked hers better, and she liked mine better - naturally - so we decided to switch.

I still have that hoodie. It has VAIL, COLORADO written on it, and it meant a lot to me about our friendship, so I saved it. Yesterday I attempted a few sewing projects, and I turned that hoodie into a drawstring backpack. I'm taking it out to CO with me ^_^


 Then a pocket on one of my hoodies was coming loose, so I decided to mend it...and I went all random and turned the mend into a heart. Sometimes I just love sewing. (And then there's days when nothing could induce me to touch a needle and thread...)


Then ^^^ I posted it them both Instagram. Because I had to. (you can follow me @ caitlin1001)

So what's your roller coaster these days? What's your latest adventure? Has God ever sent you somewhere crazy? Have you ever skied or boarded before?

Wednesday, March 28, 2012

the HUNGER GAMES tee shirt

Hello everyone:)

I recently got a new obsession: The Hunger Games. I know, ya'll are probably sick of the paraphernalia, hype, and controversy surrounding the book/movie series, blah, blah, blah...but seriously. The books are amazing.

And the movie just made my month. It was very close to the book.

Anyway, in preparation for going to see the movie, I decided to make myself a tee shirt. Here is how I did it }

{You will need}
A tee shirt (I used a black one from Goodwill)
Yellow/gold/orange fabric or another tee shirt
Red embroidery floss
Needle and thread and/or a sewing machine
A pattern for the design


}STEP BY STEP{
1. Start with your pattern.


I used the mockingjay symbol from the Hunger Games. I found an image on Google and printed it off as a full-page photo.
I printed off three copies. One, for reference, to get an idea of the full picture. The second one for the the circle. And the third one for the bird itself. I found that it looked better and more layered by breaking the design into two or three pieces.

2. Assess the materials.

This oh-so-complicated step consists of one thing: deciding where you're going to put the design. My tee shirt had a bit of a scoop neck, so I decided to attach the design to the back center of the shirt.

3. Cut out your bird.

Cut out both the circle and the bird from their respective pages, then pin the paper to the yellow/gold/orange fabric. Carefully cut around the paper outlines. Unpin the paper. And, voila, you have a yellow circle and a yellow bird!
[The yellow tee shirt I used was very thin, so I doubled it up when cutting out the bird. I only did a single layer for the circle, though.] As you can see, the fabric version of the mockingjay is not nearly as cool as the paper copy. To simulate the same shadows, etc., here's what I did. I took a pencil and drew a few lines (along the wing, the beak, and the tail). Then, when I was attaching the bird to the shirt, I followed those lines with the sewing machine, thus attaching the bird and embellishing it at the same time.

Yes, I know, I'm brilliant.

4. Attach the design to the shirt.
I wanted my shirt to look sort of vintage and rustic and not crazy-insane-fan-made (you know the spray paint creations I'm talking about). So I used black thread in my sewing machine to attach the yellow mockingjay to my black tee shirt. It showed up really well.
I sewed two lines around the circle, because it was wider than I intended. This left some fabric for a sort of frayed look, adding to the vintage feel.

It was really easy. Trust me. If you don't own a sewing machine, you could always hand-sew all of it, or even use fabric glue, though that might not hold up well for multiple wearings.

After the circle, I attached the bird using the afore-mentioned technique of adding a design to the bird using the sewing machine. A little more difficult, but give it some time. It's worth it.


5. The arrow.
You could leave your shirt like that. It would look perfectly fine. But I like embellishments, so I decided to add the arrow that the mockingjay is holding in its mouth. I first cut out my paper arrow counterpart and pinned the two tips to the shirt to get a vague idea of size and direction. I grabbed a large-eyed needle, red embroidery floss, and got to work using a basic back-stitch. It was easy! Except that...I kind of got impatient and the arrow turned out a bit crooked in the middle.

Oh well :)

And that's it! I do regret that I didn't put the design on the front of the tee shirt...but I still love it. And you could use this same type of method to create almost any emblem or symbol from your favorite books/movies.


FINITO

p.s. Several people said that I should make more and sell them. One, I regrettably don't have enough time, and two, in order to mass-produce them, I'd need more uniform materials and money...and I pretty much just raided Goodwill for this project. lol!

Wednesday, November 30, 2011

Recycling Clothes

A few weeks ago, I had a craft day. It consisted of three sewing machines, four girls, an insane amount of unwanted clothing thrown all over the place, random music, ornery scissors, and pasta salad. Needless to say, we trashed my entire dining room/computer room and had a BLAST doing it. Two things you must have if you wish to throw a "Clothing Recycle Day": plentiful amounts of energy replenishment (coffee, chocolate, FOOD) and good background music.

I was so busy slicing up t-shirts and penciling lines on fabric that I didn't pay much attention to the camera...so I've only got a few decent pictures to show you:

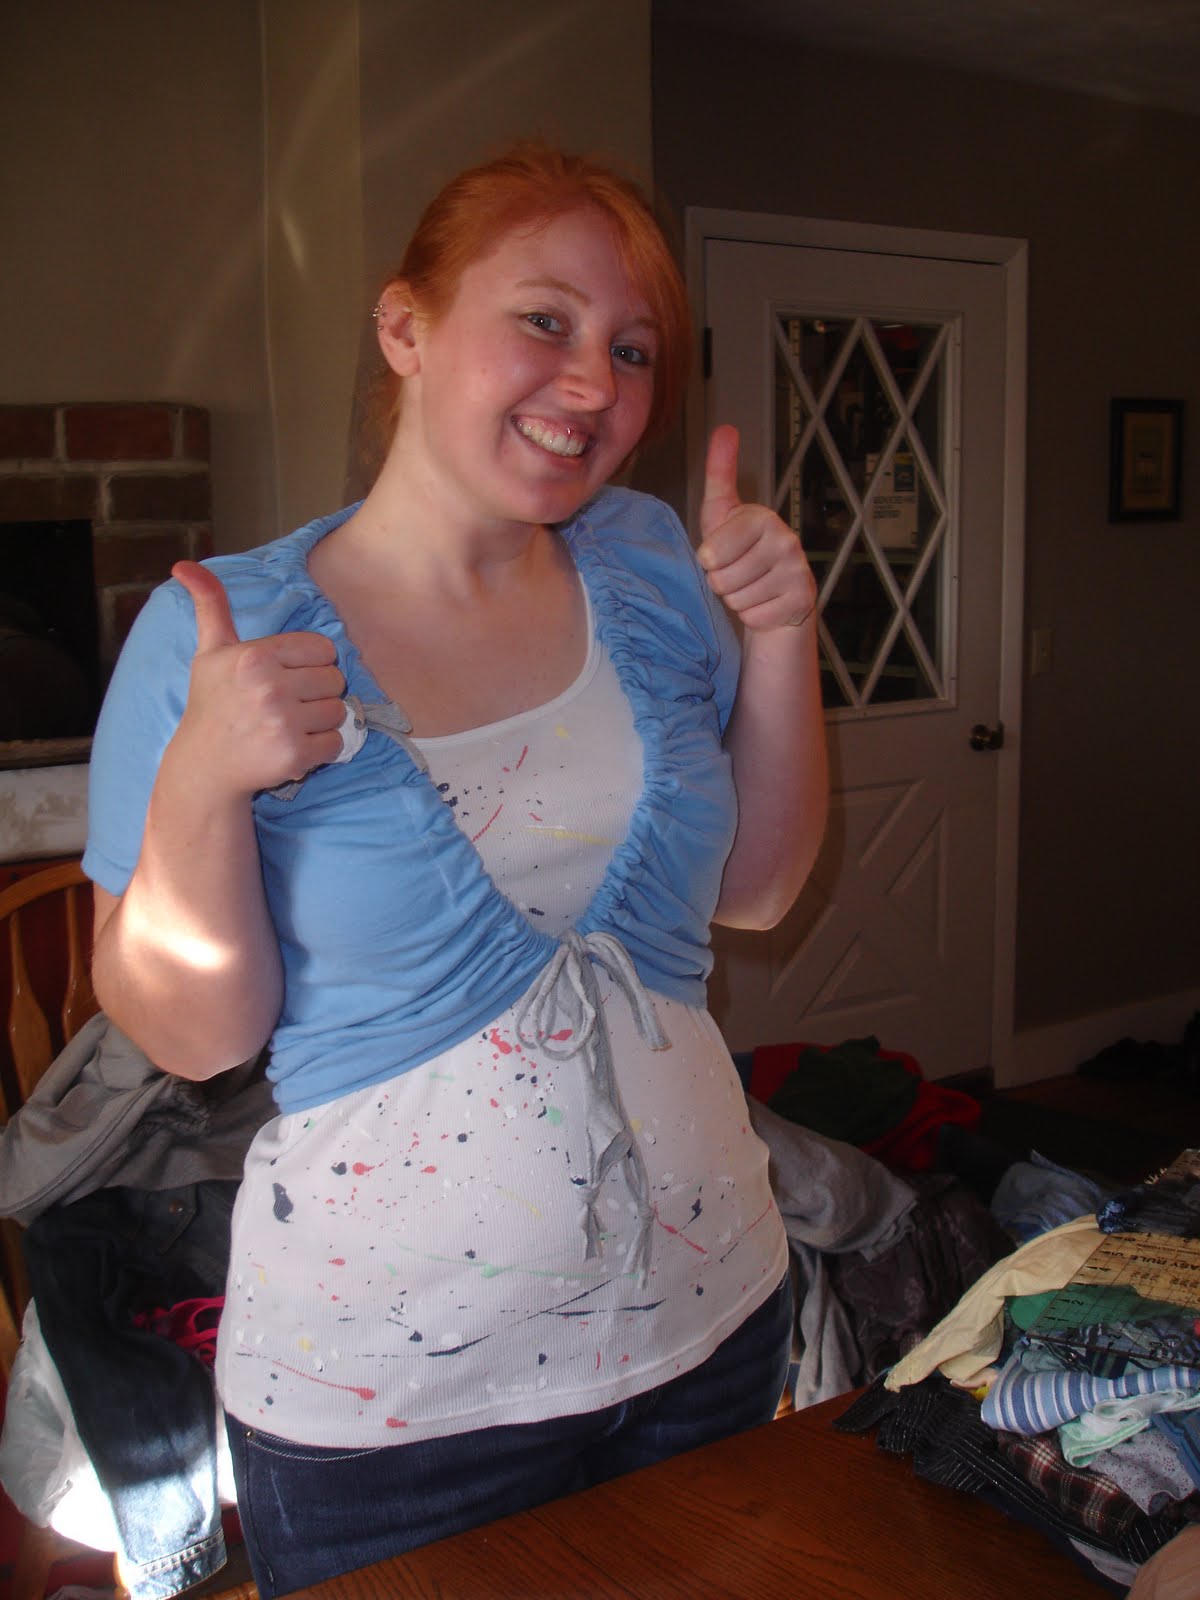
Maurissa, my friend on the left, made the light blue shrug from a t-shirt. She cut down the front in a straight line, folded it over and sewed a seam (so that there was a "pocket" for the string to fit into). For the string she used the bottom hem of a gray t-shirt. I'm almost positive that that's all she did to create these awesome-sauce threads:)

I'm the one on the right with the dorky owl hat. I'm in love with all the animal hats/mittens floating around right now, so I decided to make my own version. It didn't turn out exactly how I planned, but it's all good.

The owl is cute. My head...not so much.

To make the hat, I cut off the hood of one of my too-small, Aeropostale hoodies and folded the cut hood into a flat, normal hood shape. Then I sewed it off into a hat shape, created the owl's face with random pieces of fabric laying down, and machine sewed it together. (Note: the small pieces I hand-sewed together with brown embroidery floss for a decorative touch.) The "ears" were little pockets of fabric created from the hood itself; I could have cut them off and sewed them in, but I wanted ears :P

I know I didn't explain things very well but I didn't take any before/during pictures to show you. Next project, I'll be sure to document the process well so I can explain.

My next post will be on collages. See? Once I have a focus for my blog, I make plans! This is so good, for organization's sake, if nothing else.


Post Script ~ I wrote about dreadlocks awhile back...I'm still thinking about them...and I created a "baby" one as a test, hidden in the midst of my other hair. Shhh.